
A properly installed French drain can solve flooding issues, but getting the depth right is crucial. Most people wonder how deep a French drain should be. It’s typically 12-18 inches for yard drainage and up to 6 feet for foundation protection. The right depth prevents water damage to your property, while using a mini excavator instead of shovels makes digging a French drain faster and more precise, while saving you hours of backbreaking labor.
Why French Drains Are Important

French drains serve as a defender against water damage. When rain has nowhere to go, it can ruin your house from the ground up.
When water saturates the soil around your foundation, it creates hydrostatic pressure that pushes against basement walls and foundations. This pressure can cause concrete to crack, walls to bow, and eventually lead to structural failure. Even before structural issues arise, moisture creates the perfect environment for mold and mildew, which pose health risks to your family.
A French drain works by giving water an easier path to follow away from your house. It's pretty simple – just a gravel-filled trench with a pipe that collects water and carries it away from problem areas. Once it's installed properly, it works on its own without needing power or regular maintenance.
French drains don't just protect your house – they can also make your yard more usable. Those soggy spots that stay wet for days after rain can become dry, functional spaces for kids to play or for growing plants. Many people are surprised by how much more yard space they actually gain.
How Deep Should a French Drain Be

The depth of your French drain depends entirely on its purpose and the specific problems you're trying to solve. There's no single correct depth, but rather appropriate depths for different applications:
For surface water collection in lawns and landscaping, a shallow drain of 12-18 inches is often sufficient. This depth allows the drain to intercept water moving through the topsoil before it pools in low areas.
For foundation protection, your French drain should typically be at least as deep as the bottom of your foundation footings. This often means digging to depths of 2-6 feet, depending on your home's construction. The drain must be deep enough to reduce the hydrostatic pressure against your foundation walls.
For basements with existing water problems, you might need to install the drain at the level of the basement floor or slightly below it. This typically requires digging down 6-8 feet beside the foundation.
The drain must always maintain a consistent downward slope of at least 1% (1 inch drop per 10 feet of length). Without this slope, water won't flow through the system and will eventually cause clogs and failures.
|
Purpose |
Recommended Depth |
Why This Depth Works |
What It Solves |
|
Lawn & Landscape Drainage |
12-18 inches |
Catches water moving through topsoil |
Soggy yard areas, puddles, damaged grass |
|
Foundation Protection |
2-6 feet (as deep as foundation footings) |
Reduces pressure against foundation walls |
Water seepage into basement, foundation cracks, settling |
|
Basement Water Problems |
6-8 feet (at or below basement floor level) |
Intercepts water at the deepest point needed |
Active basement flooding, persistent moisture, mold issues |
8 Steps to Install a French Drain

A proper French drain installation follows these critical steps:
-
Planning the route: The drain must follow a path that allows gravity to move water away from the problem area to a suitable discharge point.
-
Establishing grade: Using a transit level or laser level to mark the precise slope needed throughout the trench (minimum 1% grade).
-
Excavation: Removing soil to create a trench of appropriate width (usually 6-12 inches) and depth.
-
Lining: Placing landscape fabric along the trench to prevent soil from eventually clogging the drain.
-
Adding gravel base: Placing 2-3 inches of washed gravel at the bottom of the trench.
-
Pipe installation: Positioning perforated drain pipe (holes down) along the trench, checking for consistent slope.
-
Completing the gravel surround: Covering the pipe with more washed gravel to within a few inches of the surface.
-
Finishing: Folding landscape fabric over the top and adding a final layer of soil or sod to conceal the drain.
How you dig your trench matters just as much as the materials you use. If you don't get the slope right during digging, your drain won't work properly no matter how expensive your pipe or gravel is. Think of it like building a slide – if it's too flat, nothing will flow down it.
In case you are interested in learning more about how to properly trench with a mini excavator, you can click here to read.
Different Digging Methods for French Drain
Digging a French Drain with Hand Tools
Attempting to dig a French drain with just shovels, picks, and other hand tools presents several significant challenges:
Physical demands: A typical 30-foot French drain at 2 feet deep means removing approximately 60 cubic feet of soil—weighing well over a ton. This represents hours or days of intense physical labor.
Precision difficulties: Maintaining a consistent slope (the critical 1% grade) is extremely difficult with hand tools. Even small errors in grade can render the entire system ineffective.
Time commitment: What professionals complete in hours typically takes homeowners multiple weekends of labor. This extended timeframe also leaves open trenches vulnerable to collapse from rain or other complications.
Uneven trench bottoms: Creating a flat, consistent trench bottom with hand tools is extremely difficult, yet essential for proper drainage pipe function.
Using a Mini Excavator for French Drain Installation
A mini excavator transforms the French drain installation process in several important ways:
Precision digging: The hydraulic controls and stable platform allow for remarkably precise depth control, making it possible to maintain the critical 1% slope consistently throughout the trench.
Trench quality: The bucket creates clean, straight trench walls and a flat bottom—ideal for proper pipe placement and drainage.
Time efficiency: What would take days by hand can be completed in a few hours with a mini excavator, reducing the project from multiple weekends to a single day.
Reduced physical strain: The operator guides the machine rather than performing the physical labor directly, dramatically reducing fatigue and injury risk.
Material handling: Beyond just digging, the excavator can move gravel into the trench and help with backfilling operations, further reducing the manual labor required.
The compact size of modern mini excavators allows them to access most residential properties, even through standard garden gates. With features like zero-tail swing and adjustable width tracks, these machines can work in surprisingly tight spaces beside foundations and in established landscapes.

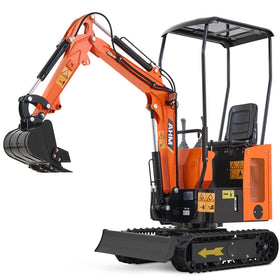
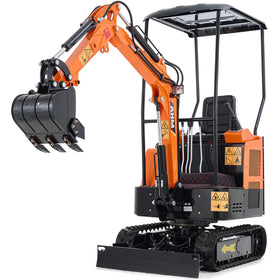
The AHM AX-16C mini excavator with its swing boom feature is particularly well-suited for French drain projects because:
- Precision digging: The hydraulic controls allow for exact depth control, ensuring your drain maintains the proper slope from start to finish.
- Speed and efficiency: What would take days of backbreaking work by hand can be completed in hours with a mini excavator.
- Works in tight spaces: The compact size of mini excavators lets you work close to foundations and in narrow side yards where larger equipment can't go.
- Reduced ground disruption: Unlike larger machinery, mini excavators cause minimal damage to your existing landscape.
- Versatility: Beyond digging the drain, you can use the same machine to move gravel, position drainage pipe, and backfill the trench.
(If you wonder how deep can there 1 ton mini excavator dig, this link can answer all your question about it.)
Frequently Asked Questions About French Drains
How do I know if my yard needs a French drain?
Your yard likely needs a French drain if you notice:
- Standing water that remains 24+ hours after rain
- Soggy areas that never fully dry out
- Water pooling against your foundation
- Basement moisture or flooding issues
- Erosion in certain areas of your yard
- Dying grass or plants due to oversaturation
How deep should a French drain be around a foundation?
When installing a French drain to protect your foundation, dig down to the bottom of your foundation footings. This typically ranges from 2-6 feet deep depending on your home's construction. This depth ensures the drain intercepts water before it can build up pressure against your foundation walls.
How wide should a French drain trench be?
A French drain trench should typically be 6-12 inches wide. This provides enough space for the drainage pipe (usually 4 inches in diameter) plus the surrounding gravel. A mini excavator can create a clean, consistent width that's perfect for proper installation.
Where should a French drain end or discharge?
A French drain should discharge water at a point downhill from your problem area. Good discharge locations include:
- A drainage ditch
- A dry well
- A storm drain (check local regulations first)
- A low area of your property away from structures
- A rain garden Never direct discharge toward a neighbor's property or where it could cause erosion problems.
How long does it take to dig a French drain?
The time required depends on length, depth, and your digging method:
- By hand: A 30-foot drain might take 1-3 full days of hard labor
- With a mini excavator: The same project might take just 2-4 hours Factors like soil type, obstacles (roots, rocks), and weather conditions can affect timing.
Conclusion

Getting your French drain depth right is the key to solving those annoying water problems in your yard or around your foundation. Whether you're digging at 12 inches for basic yard drainage or going deeper for foundation protection, what matters most is doing it in a way that works for you.
Digging by hand is totally doable for smaller projects. Many people have successfully installed French drains with just basic tools and some weekend time. But if you're looking at a bigger project or want to save your back, a mini excavator can make the job so much easier.
The AHM mini excavator is designed to help homeowners tackle projects like French drains without the exhaustion. Its precision controls help you get that perfect slope that keeps water flowing away from your home for years to come.
The team at AHM is always happy to offer advice, even if you're still in the planning stages. Visit AHM or give us a call to learn more about solving your water problems the easy way.


