A retaining wall can transform your sloped yard into valuable, usable space. Recent landscaping surveys show that a well-built retaining wall typically increases property value by 15%, offering nearly a 100% return on investment. However, here's something most guides won't tell you: about 30% of DIY retaining walls show signs of failure within five years, usually because of poor planning and drainage issues.
This guide will help you avoid those common mistakes. We'll walk through every step of building a stable retaining wall on your slope, using techniques that professional landscapers rely on.
Quick Project Overview
- Building Time: 2-3 days for a 20-foot wall section
- Skill Level: Intermediate
- Average Cost: $15-30 per square face foot
Essential Planning: First Steps for Success
Before you start digging, let's get your project set up right.
Check Local Requirements
Most areas require permits for walls over 4 feet tall. Call your local building department first - fixing a non-compliant wall costs far more than getting proper permits. While you're at it, have utility companies mark any underground lines in your work area.
Assess Your Slope and Space
For every foot of wall height, you'll need about 3 feet of level working space behind your planned wall. This gives you room to:
- Move materials safely
- Install proper drainage (the number one factor in wall longevity)
- Operate equipment efficiently
Consider Equipment Needs
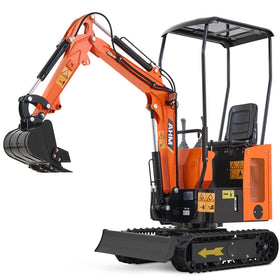
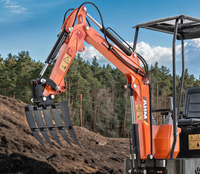
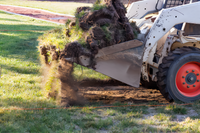
While small retaining walls can be built by hand, slopes over 25 degrees or walls longer than 20 feet become significantly more manageable with proper equipment. A 1 ton mini excavator with a swing boom can reduce a full day's manual labor to just a few hours, especially during site preparation and material handling.

While small retaining walls can be built by hand, slopes over 25 degrees or walls longer than 20 feet become significantly more manageable with proper equipment.
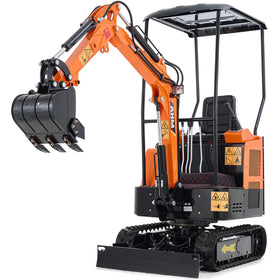
For these projects, consider a compact excavator like the AHM AX-15. With its 69-inch digging depth and 120-inch maximum digging radius, it's perfectly sized for retaining wall construction. The 36-inch width lets you access tight residential spaces, while the Kubota D722 engine offers reliable power with minimal vibration - crucial when working on precise tasks like bench cutting and foundation preparation.
The AX-15's hydraulic joystick control system, following ISO operation standards, provides the precise control you need for:
- Creating level benches with consistent depth
- Cutting accurate foundation trenches
- Placing heavy materials exactly where needed
- Installing drainage systems efficiently
Plus, its rubber tracks protect existing landscaping and pavement while providing stable operation on slopes. The 15.7-inch grading bucket that comes standard is ideal for creating the level surfaces retaining walls require.
Site Preparation: Creating Your Foundation
Good preparation prevents most common retaining wall failures. Let's break this crucial phase down step by step.
Marking Your Layout
Start by marking your wall's position:
- Drive stakes at both ends of your planned wall
- Run a string line between them to mark the wall's front face
- Measure back 4 feet and place parallel stakes for your work zone
- Clear all vegetation, roots, and organic material from this area
Creating Level Benches

This is where proper equipment makes a huge difference. You'll need to cut "benches" - level platforms - into your slope. A mini excavator with a swing boom can maintain precise depth and level while working along the slope, turning hours of manual labor into a quick, accurate process.
Each bench needs:
- Width equal to your block width plus 2 feet for drainage material
- A slight backward tilt (1 inch drop per 4 feet) for water management
- Completely level surface from side to side
Foundation Trench Preparation
Your foundation trench determines how well your wall stands up over time. The trench should be:
- Twice the width of your wall blocks
- At least 12 inches deep (or below frost line in cold climates)
- Perfectly level across its width
Using a mini excavator with a smooth hydraulic control system helps maintain consistent depth and width while creating clean trench walls - crucial for proper base material placement.
Building Your Wall: The Construction Phase
Base Material Installation
Fill your trench with 6 inches of crushed stone or gravel. Compact it thoroughly using a plate compactor, making several passes until the stone doesn't compress further. A solid base prevents future settling and wall movement.
First Course: Getting it Perfect
The first course of blocks sets the standard for your entire wall. Take extra time here:
- Start at the lowest point of your slope
- Place blocks tightly together
- Check level front-to-back and side-to-side for each block
- Use a string line to ensure perfect alignment
- Fill gaps under blocks with gravel, compacting thoroughly
Building Upward
As you add courses:
- Clean the tops of blocks before placing the next course
- Maintain proper setback (typically ¾ inch per foot of wall height)
- Stagger joints between courses for stability
- Backfill and compact after each course
- Check level and alignment frequently
Drainage System: The Key to Wall Longevity
Poor drainage causes 75% of retaining wall failures. Here's how to get it right:
Base Drainage
Install a perforated drainage pipe at the base of your wall:
- Place it just behind the wall blocks
- Ensure it slopes 1 inch per 8 feet for proper water flow
- Connect it to a drainage outlet or collection point

Drainage Column
Create a column of clean gravel behind your wall:
- Use gravel with no fine particles
- Make the column at least 12 inches wide
- Fill it as you build each course
- Place filter fabric between the gravel and soil
Finishing and Maintenance
Completing Your Retaining Wall
- Install cap blocks using concrete adhesive
- Grade soil at top to direct water away from wall
- Add topsoil and landscaping (keeping large plants 3 feet back from wall)
Regular Maintenance
Check your wall twice yearly:
- Ensure drainage outlets remain clear
- Look for any leaning or bulging
- Check for erosion around wall ends
- Clear any debris from behind wall
When to Call In Experts
- Consider professional assistance if:
- Your wall will exceed 4 feet in height
- You notice water seeping from the slope
- The soil seems unstable
- You need to protect existing structures
A properly built retaining wall can last decades, while cutting corners often leads to expensive repairs within just a few years.

Cost and Time Considerations for Retaining Wall
Your total project cost depends primarily on your wall's size and your site conditions. The height of your wall particularly impacts costs, as taller walls require deeper foundations and often need additional reinforcement.
Material costs vary based on your choice of blocks. Basic concrete blocks might start around $5-8 per square face foot, while premium blocks with natural stone facing can run $20-25 per square face foot. Remember to factor in additional materials like:
- Base gravel (typically 6 inches deep and twice your wall width)
- Drainage gravel (running the full height of your wall)
- Filter fabric
- Drainage pipe
- Cap blocks and adhesive
Equipment needs affect your budget too. If you're renting a mini excavator, ask local rental companies about weekly rates rather than daily - they often offer significant discounts for longer terms. Many projects benefit from having the equipment available throughout construction rather than just during site preparation.
Timeline Planning
Your construction timeline depends heavily on your wall's length and height. A shorter wall (under 30 feet long and 3 feet high) typically progresses through these stages:
- Site preparation: Includes layout, clearing, and bench cutting
- Foundation work: Creating and compacting your base
- Block installation: Setting courses and drainage materials
- Finishing: Installing caps and final grading
Each stage requires proper curing and compaction time. Rushing these steps often leads to stability issues later. Weather conditions also impact your timeline - wet soil needs extra time to reach proper compaction levels.
Consider breaking larger projects into manageable sections. This approach lets you complete each section properly before moving to the next, ensuring quality while making the project more manageable.
Frequently Asked Questions
How deep should a retaining wall be for a slope?
The base should be buried at least 1 inch for every foot of wall height, with a minimum depth of 6 inches or below frost line in cold climates.
Do I need drainage behind my retaining wall?
Yes, proper drainage is essential. Install a perforated pipe at the base and create a gravel drainage column behind the wall.
What's the best material for a sloped retaining wall?
Interlocking concrete blocks are most popular for DIY projects, offering good strength and easy installation.
Conclusion
Building a retaining wall on a slope might seem daunting, but taking it step by step makes it manageable.
Focus on proper planning, site preparation, and drainage installation - these three elements determine how well your wall performs over time. Whether you're tackling this as a DIY project or bringing in equipment to handle the heavy work, the key is not rushing through any phase.
A well-built retaining wall does more than just hold back soil - it adds value to your property and transforms unusable slopes into practical space for years to come.


