
So, you have just bought a new, different bucket for your mini-excavator, and you want to try it out and maybe even compare it to the old bucket. To do that, you will need to remove the old bucket and attach the new one. At first, it might sound complicated and hard, but we will guide you through the whole process.
In this article, we will show you how to change the bucket on a mini-excavator and give you some additional tips. Keep reading!

5 Steps To Change Bucket on Mini-Excavator
To change the bucket, you don’t need a lot of experience or some extremely specific tools. Even a beginner could figure out how to change bucket on mini-excavator, as long as they follow the following steps.
1. Park Your Mini Excavator
First, you will need to park your mini-excavator somewhere where you will have enough space to change the buckets. The terrain should also be flat and leveled, so you don’t have to worry about your mini-excavator starting to move on its own. Of course, to prevent this, you should also turn the engine off and pull the parking brake.
But before doing that, you need to lower the excavator’s arm so that you can easily work with the buckets. After you’ve done that, you should turn off the engine, pull the parking brake, and ensure that your mini-excavator can’t move even one inch.

2. Remove The Bucket
Now, it’s time to remove the old bucket. Start by releasing the remaining hydraulic pressure. Usually, you do it by cycling the controls when the engine is already turned off. Then, go to the bucket and look for the attachment pins or an automatic coupler system. These are connecting the bucket to the excavator’s arms, and you will need to use them to detach the bucket.
If the bucket has pins that keep it connected, you need to remove them. You will probably need to use a hammer and punch or a pin press to do it. In case the bucket is attached to the excavator arm with quick couplers, use the latch systems to detach the couplers or follow the manufacturer’s manual if these couplers connect and disconnect some other way.
Once you figure out how to disconnect the bucket, slowly and carefully remove it and set it aside. This is a good time to inspect this bucket for any damage or potential issues and maybe even clean it a bit. You can also store it somewhere where it will be protected against the elements, waiting for its next use.
3. Attach a New Bucket
It’s time to bring out the new bucket that you want to attach. Align it to the excavator’s arm and bring it as close as possible. The same pins or couplers that you used to detach the old bucket, you will now use to attach the new one.
Push the bucket pins back into their place. If you are using couplers, connect them as per the manufacturer’s manual. Double-check every connection to ensure everything is attached securely. You don’t want your bucket to get loose and fall off when you start working, as that could lead to damage and other issues.

4. Check If Everything Works
Go back to the control table of your mini-excavator. It is time to test if everything works properly. Move the excavator arm up and down, left and right. Then, tilt the bucket forward and backward. Repeat a few times until you are sure everything is functioning as it should.
In case you notice any issues or weird noises, go back to the bucket and inspect the attachment. Maybe you have missed something. Check the hydraulic system as well because you might have pinched the hydraulic hoses when attaching the bucket.
5. Final Checks
Finally, before you start working with this new bucket, check everything once again. We know it might sound like too much checking, but you can never be too safe. Evey thing that goes wrong with your mini-excavator bucket can not only cause significant material damage, but it can also pose a major safety risk.
To avoid damages and safety risks, inspect the bucket attachment once again. Look for any loose pins and screws, detached cables, and hoses. Use this as an opportunity to check the rest of the excavator. Is everything looking good? Are all parts securely attached?

Additional Tips To Consider
We have shown you how to change bucket on mini-excavator, but let’s also take a look at some additional tips that might be of help to you and keep you safe. For example, do you know how much does a mini excavator bucket weigh? They can weigh 200+ lbs or much, much more. That’s why you need to take some safety precautions when working with these buckets.
Always wear safety gloves, a hard hat, and steel cap-toe shoes. Before each use, inspect the bucket and the rest of your mini-excavator. Don’t overload your bucket because it can lead to overtipping of the entire vehicle, as well as many other issues.
When trying to figure out how to change bucket on Bobcat mini excavator, always read a manufacturer’s or user manual. This manual is useful in other situations as well, and you should read it at least once. Finally, try to work with high-quality mini-excavators and attachments. Take a look at these options:
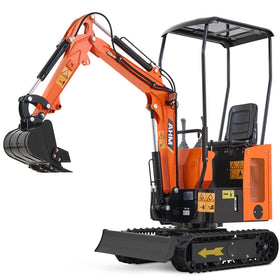
13.5HP Mini Excavator B&S Engine with 6 Attachments

This mini-excavator comes with six different attachments, one of which is one narrow bucket. If you want to use another bucket, you can easily attach it.
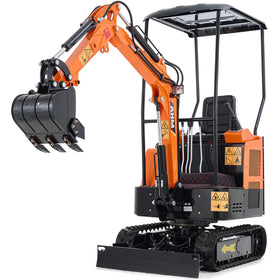
23 HP 1.3 Ton B&S Engine Mini Excavator
For those who want a bit more power, this 23 HP mini-excavator is a perfect choice. It supports multiple types of attachments, including the bucket attachments.
Conclusion
In this article, we tried to show you how to change the bucket on your mini-excavator in five easy steps. Hopefully, we did a great job, and now you can easily switch between different buckets and even other types of attachments. Remember, check everything (at least) twice, and stay safe!


