
Hydraulic leaks can drain your wallet faster than they drain your machine. Some hydraulic leaks like the dark spots under your mini excavator, might seem minor at first. In fact they can lead to expensive repairs and lost workdays if ignored. Regular inspection helps catch these leaks early, saving you from costly repairs and unexpected downtime on your job site.
1. Locating the Hydraulic Leaks

The first step in hydraulic leaks repair is locating where the fluid is escaping. Many operators find leaks during their morning equipment checks. Common leak points include:
- The hydraulic cylinder seals on your boom and arm
- Connection points between hydraulic lines
- The rotary union near your excavator's swing mechanism Main pump housing seals
Think of finding a hydraulic leak like trying to find where your car is leaking oil - you need to start with a clean surface to really see what's going on. When hydraulic fluid leaks, it tends to run down and spread around, making it tricky to find where it's actually coming from. That's why the first step is always getting everything clean and dry.
Here's what professional mechanics do: They start by spraying the whole area with a strong degreaser - kind of like what you'd use to clean a really greasy stove. They'll use an air compressor to blow everything dry and clean. This gives them a fresh canvas to work with. Once everything's clean, they can run the excavator and watch where the fluid first appears, rather than trying to guess based on where oil has built up over time.
2. Fixing Common Hydraulic Leaks
When hydraulic fluid escapes from a mini excavator's system, it's usually due to three main mechanisms, each with distinct characteristics and repair approaches:
1) Loose or Damaged Fittings:
The most common source of hydraulic leaks occurs at connection points where hydraulic lines join components like pumps, valves, and cylinders.
When dealing with a leaking fitting (where hydraulic hoses connect), the fix might seem as simple as tightening it up - but there's actually a careful process to follow.
You'll want to first clean the area completely and mark the current position of the fitting. This is important because over-tightening can be just as bad as having it too loose. Think of it like tightening lug nuts on a car wheel - there's a specific amount of force needed, no more and no less. You'll need to check your excavator's manual for the exact torque specifications, then use a torque wrench to get it just right. If tightening doesn't solve the leak, you might need to take the fitting apart and check the threads for damage or replace the sealing washer.
2) Failed Seals:
Hydraulic seals are rubber or synthetic components that create tight barriers between moving parts, particularly in cylinders and pumps.
These seals naturally wear down over time as they're exposed to heat cycles, pressure changes, and friction.
For seal leaks, especially in the cylinders that move your excavator's arm and bucket, the repair process is more involved but still manageable with the right approach. You'll need to fully depressurize the system (think of it like taking pressure out of a tire before working on it), then carefully disassemble the cylinder.
The tricky part is removing the old seals without scratching the cylinder walls. Even tiny scratches can prevent new seals from working properly. Professional mechanics often use special plastic tools rather than metal ones to avoid causing damage during this process.
3) Damaged Lines:
The most serious type of leak comes from damaged hydraulic lines. Unlike fitting or seal leaks that usually start small, a cracked or burst line can quickly lose gallons of fluid and leave you stranded.
The fix here is straightforward but critical - the entire damaged section needs to be replaced. You can't patch hydraulic lines like you might patch a garden hose. The pressure inside is just too high. When replacing lines, you need to match not just the size but also the pressure rating of the original hose. It's like making sure a replacement tire can handle the same speed rating as your original ones.
3. Hydraulic System Maintenance

Regular maintenance can prevent many common leak issues. Check these key areas during your equipment inspections:
- Hydraulic fluid levels should stay consistent between checks
- Look for dark spots or fluid accumulation under parked equipment
- Monitor system pressure readings during normal operation
- Keep hydraulic components clean to spot new leaks quickly.
4. Understanding Your Mini Excavator's Hydraulic System

Your mini excavator's hydraulic system operates under high pressure to power digging, lifting, and travel functions. A typical system runs at around 2,500 PSI, which explains why even small leaks can quickly become serious problems.
The system consists of several key components working together:
- The main hydraulic pump generates pressure for all functions
- Control valves direct fluid flow to different attachments
- Cylinders convert hydraulic pressure into mechanical movement
- Return lines bring fluid back to the reservoir
When one component develops a leak, it affects the entire system's performance. For example, a leaking cylinder seal not only loses fluid but also reduces the pressure available for other functions.
5. Frequently Asked Questions About Mini Excavator Hydraulic Leaks

1) How long can I run my excavator with a small hydraulic leak?
While you technically can operate with a minor leak, it's not recommended. Small leaks often worsen quickly under pressure. Additionally, low fluid levels from ongoing leaks can damage your hydraulic pump and other components. Fix even minor leaks as soon as possible to prevent more expensive repairs.
2) What causes hydraulic seals to fail prematurely?
Seal failure often results from contaminated hydraulic fluid, excessive heat, or cylinder rod damage. Using the wrong type of hydraulic fluid or operating with worn cylinder rods can quickly damage seals. Regular fluid analysis and rod inspection help prevent premature seal failure.
3) Can cold weather cause hydraulic leaks?
Yes, cold temperatures can cause seals to become less flexible and hydraulic fluid to thicken. Always allow your excavator to warm up properly in cold weather before operation. Using the correct viscosity hydraulic fluid for your climate also helps prevent cold-weather leaks.
4) How often should hydraulic fluid be changed?
Most manufacturers recommend changing hydraulic fluid every 2,000-4,000 operating hours. However, fluid analysis can help determine the optimal change interval for your specific situation. Factors like operating conditions, environmental contamination, and system cleanliness affect fluid life.
If you want to learn more about how to change hydraulic fluid, click here to read more.
5) What's the difference between internal and external hydraulic leaks?
External leaks are visible as fluid drips or wet spots on your mini excavator. Internal leaks occur when fluid bypasses seals inside components, which can cause reduced performance without visible leakage. Internal leaks often require professional diagnosis using pressure testing equipment.
6) Is it normal for hydraulic fittings to need periodic tightening?
While some settling of fittings is normal, frequently loose connections may indicate vibration problems or improper initial installation. When tightening fittings, always use a torque wrench and follow manufacturer specifications to prevent damage.
6. When to Call a Professional
While some hydraulic repairs are straightforward, complex issues require professional attention. Get expert help if you notice:
Multiple leak points developing at once Significant pressure loss during operation Internal component damage signs Contaminated hydraulic fluid
Proper hydraulic system maintenance keeps your mini excavator productive and prevents unexpected repair costs. Regular inspections and prompt attention to small leaks help avoid more serious problems.
7. Conclusion

Hydraulic fluid leaks in mini excavators represent more than just lost fluid - they threaten your equipment's reliability and your project's timeline. Through proper identification, timely repairs, and consistent maintenance, you can protect your investment and maintain optimal performance.
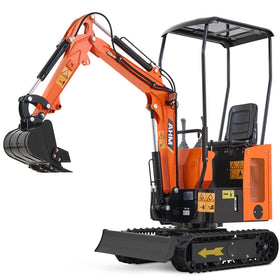
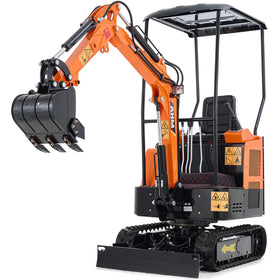
At AHM, we offer high quality mini excavators and top-notch customer support for your equipment needs. We understand that choosing the right mini excavator is crucial for your business success. Our commitment to quality means every excavator we offer is built to deliver reliable performance and value.
While we focus on providing exceptional equipment rather than maintenance services, we ensure our customers have access to detailed product information and specifications to help them make informed decisions about their equipment care.


