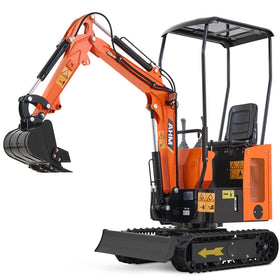
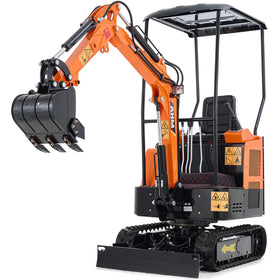
When you first start using a mini excavator for grading, you'll need to understand which parts of the machine actually do the work. While most people focus only on the bucket, successful grading uses both the bucket and blade effectively.
1. Using Your Bucket for Grading
First, you need to loosen the soil. Point your bucket teeth straight down and rake the ground - your mini excavator isn't powerful enough to just push through hard soil. Make several passes until the ground is workable.
Think about pulling a straight line when you're grading. Find a fixed point on your bucket and focus on that instead of watching the teeth. This helps you maintain a consistent grade. As you pull the bucket toward yourself, watch how the ground level changes in relation to your bucket edge.

2. Making Clean Passes
Here's what makes the difference between rough and smooth grading: Only move over about one-third of your bucket width for each new pass.
When making grading passes with your bucket, a common mistake is trying to use the full bucket width. Here's why this causes problems and how to do it correctly:
If you move over the full bucket width between passes, two major issues occur:
- The soil has nowhere to roll except around your bucket edges, creating uneven ridges
- These ridges become increasingly difficult to smooth out, leading to washboard-like surface patterns that affect drainage
Instead, overlap your passes using only one-third of the bucket width. This technique:
- Allows material to flow consistently along your bucket face
- Creates a smoother transition between passes
- Prevents ridge formation at the edges
- Maintains even pressure across your grading surface
Think of it like mowing a lawn - you overlap each pass slightly to avoid missing strips. The same principle applies here, but with more precision required due to soil movement.
When you're making passes:
- Watch for daylight between your previous grade and bucket edge
- Keep your bucket teeth lined up with the trenches you've already made
- Pull in straight lines toward yourself
- Let the material flow naturally
3. Using the Blade Effectively
Your mini excavator's blade serves a dual purpose: machine stabilization and precision grading control. Understanding proper blade operation significantly impacts grading accuracy and project efficiency.
Initial Blade Position Setup

Position your blade slightly above ground level before beginning grading operations.
This starting position allows you to gauge material movement and establish optimal cutting depth.
Material Flow Management
Initiate forward movement with gentle blade-to-soil contact.
The key is maintaining consistent material accumulation in front of the blade. Watch how the soil rolls - it should form an even ribbon across the blade's width.
Elevation Control Process
For managing varying surface elevations:
1. High Spot Reduction:
Lower your blade approximately 1/2 inch below grade line when approaching elevated areas. Maintain steady forward movement while monitoring material displacement. This controlled cutting action prevents aggressive soil removal that could create depressions.
2. Low Area Filling:
When approaching depressions, gradually raise your blade height. This controlled release deposits material evenly into low spots. Watch the leading edge of your material roll - it should flow smoothly into the depression without creating new high spots.
4. Working with Grade Changes

Grade changes require precise blade control and careful material management. Successful transition grading depends on maintaining consistent material flow while adjusting blade position.
Transition Zone Approach:
- Establish your starting grade line
- Monitor your blade's cutting edge position relative to existing grade
- Execute gradual height adjustments - aim for smooth transitions over 3-4 feet minimum
- Observe material movement patterns across the blade face
Critical Control Points:
- Maintain steady forward speed through transitions
- Watch material accumulation at blade edges
- Adjust blade height in small increments
- Allow natural material distribution into low areas
Effective grading requires patient skill development. Begin with straightforward projects featuring minimal grade changes. Progress to more complex transitions as you master basic blade control techniques.
5. Mastering Mini Excavator Grading Operations
Successful grading with your mini excavator comes from understanding proper technique and practicing systematic approaches. AHM's line of mini excavators provides the precise control and power needed for professional grading results. Whether you're tackling basic yard leveling or complex grade transitions, following these proven methods will help you achieve smooth, even surfaces that meet project specifications.

In case you are looking to achieve professional-grade results with your mini excavator. AHM compact excavators, engineered with precision 2585 lbf digging force and 68.9-inch maximum digging depth, deliver optimal grading performance for both professionals and DIY enthusiasts.
For more information about AHM mini excavators and their grading capabilities, visit our product page or contact our technical support team.


