
Professional paver patio installation for a 300-square-foot area takes about 35-40 hours and costs anywhere between $6,000 and $9,000 when you hire contractors. DIY the same project, and you're looking at 40-50 hours of backbreaking shovel work just to excavate 6-8 inches deep across the entire area.
But here's the key: switch to a mini excavator, and the excavation work that breaks most DIY patio projects becomes manageable. The impressive digging depth and the powerful digging force of a mini excavator can power through compacted soil at consistent depths, while the 360-degree rotation eliminates the need to constantly reposition.
What takes two workers 6 hours to hand-dig gets done in 90 minutes, and the precision digging creates level surfaces that skid steers simply can't match for patio work.

Everything You Need To Install a Patio Paver With a Mini Excavator
1. Essential equipment:
- Mini excavator (1-2 ton capacity for residential patios)
- Plate compactor (7,000+ lbs centrifugal force for proper base compaction)
- Wheelbarrow for transporting materials
- Level (4-6 feet) and string lines for checking grade
- Rubber mallet for setting pavers
- Masonry saw or angle grinder with a diamond blade
Materials required:
- Pavers (calculate square footage + 10% waste for straight patterns, 15-20% for curves)
- Crushed stone or gravel base (4-6 inches compacted depth)
- Coarse bedding sand (1-inch layer)
- Landscape fabric (optional for weed prevention)
- Edge restraints (plastic or metal)
- Polymeric sand for joints
Site Preparation: Prep Work Before You Begin
Mark your patio boundaries with stakes and string, extending 6 inches beyond the finished patio dimensions to accommodate edge restraints. Call 811 before digging - hitting utility lines isn't worth skipping this step.
Calculate the excavation depth: Your total excavation depth = paver thickness + sand layer + base layer.
For standard 2⅜-inch pavers with 1-inch sand and 6-inch base, dig 7-8 inches below finished grade. Cold climate regions require 10-12 inches total depth for frost resistance.
Excavation process: Position the excavator at your patio site and start from one corner, working systematically. Maintain the 1/4 inch per foot slope throughout - this prevents water pooling against your house.
Pile excavated soil at least 6 feet from the patio edge. For 300 square feet at 8 inches deep, you're removing 7-8 cubic yards requiring disposal.

Step-by-Step Process for Installing Paver Patio
Step 1: Build the Base Using the Mini Skid Steer
After excavation, install optional landscape fabric over the soil. This prevents base material mixing with subgrade and stops weed growth.
Add crushed stone base material in 2-inch layers. For a 6-inch total base depth, spread three separate 2-inch layers. A mini skid steer with bucket attachment can transport and spread this material, though a mini excavator's bucket works equally well.
Compact each 2-inch layer thoroughly with a plate compactor rated at 7,000+ lbs force. Walk overlapping passes until the base doesn't shift underfoot. Check grade after compacting each layer - maintain that critical 1/4 inch per foot slope.
Step 2: Set the Bedding Layer - For Moving Sand
Spread 1 inch of coarse concrete sand (C-33) over the compacted base. Avoid play sand - it's too fine and shifts under paver weight.
Lay two 1-inch diameter pipes parallel across the base. Pour sand between the pipes and drag a straight 2x4 board across them to create a perfectly level 1-inch sand layer. Remove the pipes, fill the gaps, and smooth the level with the surrounding sand.

Step 3: Lay the Pavers
Start at a 90-degree corner (typically where the patio meets your house). Work outward, placing pavers straight down into sand - never drag them.
- Leave consistent 1/8 inch gaps between pavers
- Work from pavers you've already placed - don't step on levelled sand
- Check the level frequently across sections
- Tap pavers gently with a rubber mallet to set in sand
Step 4: Cutting and Edging
Measure and mark pavers requiring cuts for edges and obstacles. Use a masonry saw with a diamond blade for clean cuts. Wear safety glasses and a dust mask.
Install edge restraints around the entire perimeter. These plastic or metal restraints prevent outward paver shifting. Secure with 10-inch galvanised spikes every 12-18 inches.
Step 5: Final Compaction and Finishing
Run the plate compactor over finished pavers. This embeds them into sand bedding and ensures level, stable surfaces. Make 2-3 passes in different directions.
Spread polymeric sand over pavers and sweep into all joints. Compact again lightly, add more sand to refill settled joints, then mist with water to activate the polymeric sand's binding properties.

Safety Tips for Installing a Patio Paver with a Mini Excavator
- Maintain 10-foot clearance around operating excavators
- Never work under raised buckets
- Operate on stable, level ground only
- Wear steel-toe boots near heavy equipment
Precautions for manual work:
- Lift pavers properly - bend knees, not back (pavers weigh 15-30 pounds each)
- Wear safety glasses when cutting
- Use hearing protection with plate compactors (90+ decibels)
- Work gloves prevent blisters and abrasions
Site safety:
- Call 811 for utility locates before excavation
- Barricade work areas from foot traffic
- Store materials away from excavation edges
Mini Excavators vs Skid Steers: Which is Better For Paio Paver Installation?
When it comes to digging patios, a mini excavator, especially a mini excavator with a swing boom, is more versatile than a mini skid steer. With a mini excavator, you can typically cover the same ground with less movement, less need for adjustment, and much more flexibility.
The unique advantage of installing a patio paver with a mini excavator is that the mini excavator's hydraulic arm creates smooth, level surfaces at consistent depths across the entire patio area.
The 360-degree cab rotation means you can excavate the full site from a single position - no repositioning needed. That saves you a lot of time and effort, and you can stick to your plan more easily.
Skid Steers For Installing a Patio Paver.
Skid steers work for installing a patio paver, and many people use them with no problems. However, using a mini skid steer for patio paver installation requires constant backing up, turning, and repositioning to cover the same area, adding hours to excavation time.
Also, when installing a patio paver, digging depth matters more than most people realise. Skid steers max out around 12-18 inches, leaving minimal working margin. If you hit compacted clay or need to remove old concrete, that shallow depth becomes a serious limitation.

Choosing the Right Mini Excavator For Patio Installation
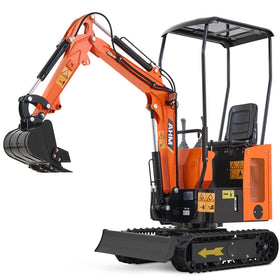
1. AHM AX-12B - $5,399.99
The AX-12B at 2,138 pounds delivers residential patio excavation capability while fitting through standard 36-inch gates.
- Digging depth: 69 inches handles all residential excavation
- Digging force: 2,585 lbf powers through compacted soil
- Width: 37 inches fits backyard access
- Reach: 120 inches covers the work area from a single position
- Fuel efficiency: 0.26 gal/h keeps costs low
2. AHM AX-15 - $7,999.99
The AX-15 with Kubota D722 engine provides superior reliability for professional installers.
Professional features:
- Kubota engine: Runs 3x longer than standard engines
- Digging force: 2,698 lbf for tough soil
- EPA Tier 4 compliant
- External hydraulics: Easier maintenance
- 69-inch depth handles all residential work.

The Bottom Line
How to install a paver patio successfully requires proper 6-8 inch excavation depth (10-12 inches in cold climates), thorough base compaction in 2-inch layers, and maintaining 1/4 inch per foot drainage slope.
How long does it take to install a paver patio ranges from 2-4 days for 300-square-foot projects - professionals complete this in 35-40 hours, while DIY projects need 40-50 hours.
While mini skid steers handle material transport better, mini excavators dominate the excavation phase, which consumes 60% of project time. The 360-degree rotation and deep digging capability make mini excavators the better choice for patio excavation work.


