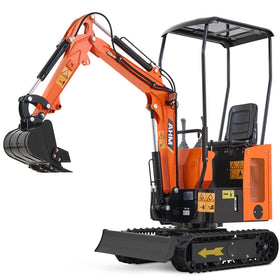
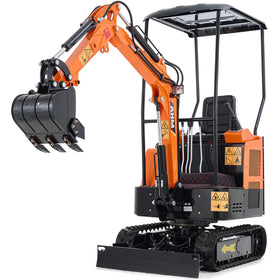
Installing a hydraulic auger on your mini excavator can significantly enhance its utility, making it an essential tool for various tasks like digging post holes, planting trees, and more. This guide provides a step-by-step process for assembling and connecting a hydraulic auger, ensuring that your installation is smooth, secure, and ready for action.
(Reading Time: 5-9 Minutes)
1. What is an Auger Attachment?
An auger attachment is essentially a large, powered drill bit that connects to a mini excavator. It allows the operator to create deep, uniform holes quickly and efficiently. These excavator attachments come in various sizes and styles to suit different project needs.

Common Uses for Auger Attachments:
- Landscaping: Planting trees and large shrubs
- Construction: Installing fence posts and deck supports
- Agriculture: Setting up fencing and planting poles
- Utility work: Creating holes for signs or utility poles
2. Who Needs an Auger Attachment?
Auger attachments increase productivity by reducing the time and labor required for digging holes manually. They also ensure consistent hole depth and diameter, which is crucial for many construction and landscaping projects.
- Landscaping contractors
- Construction companies
- Farmers and ranchers
- Utility companies
- Property developers
- Homeowners with large properties
If your projects often involve digging many deep holes, an auger attachment can be a smart investment. It streamlines work and may cut costs. Consider your needs carefully - for those who frequently drill holes, this tool can be invaluable.
3. Attaching the Thumb
This article uses AHM 8" Diameter Hydraulic Auger Drill Attachment as an example. First, let’s go over the tools included in this product’s kit.

|
No. |
Item |
Qty. |
|
A |
Auger Bit |
1 |
|
B |
Driver Unit |
1 |
|
C |
Bolt and Nut |
2 |
|
D |
Axis Pin |
2 |
|
E |
Hose |
1 |
|
F |
M14×1.5 Male to M16×1.5 Male Thread Adapters |
2 |
|
G |
M14×1.5 Male to M14×1.5 Male Thread Adapters (These adapters can be used for other attachments as needed) |
2 |
Step 1: Connect the Auger Bit to the Drive Unit
Start by aligning the auger bit with the drive unit. Use the provided bolt and nut to secure them together. Make sure everything is tight and secure to avoid any issues during operation.

Step 2: Remove the Existing Attachment (If Necessary)
If your small excavator has an existing attachment, such as a bucket, you'll need to remove it. This involves taking out the axis pins that hold the attachment in place. Keep these pins handy; you might need them later.

Step 3: Mount the Auger on the Excavator:
- Align the Auger: Position the auger so that its holes align with the ones on the excavator arm and the attachment bracket.
- Secure with Axis Pins: Insert the axis pins to hold the auger in place. These pins are usually included with the auger, but if not, you can use the ones you removed earlier. Double-check to make sure the auger is firmly attached and won't shift during use.

4. Connecting the Hydraulic Hoses
Depending on whether your excavator is equipped with hydraulic valves, the process for connecting the hydraulic hoses will differ. Below are the steps for each type:
For excavators with a hydraulic valve for its hoses as below (using the AHM 13.5 HP B&S Engine Mini Excavator as an example)
- Park the excavator on level ground.
- Lower the arm to a height that is easily accessible for mounting, and shut the engine.
- Wait until the engine and hydraulic oil have cooled to ambient temperature.
- Close the hydraulics by turning the hydraulic valves clockwise 90° until their debossing is perpendicular to the arm.

- Remove the screw nut of the valve to expose the male thread by holding the male thread still. Cover the exposed thread with plastic wrap (not included).
Note: DO NOT remove the male thread.

If you accidentally only removed the shell of the screw nut, remove the core of the screw nut too to expose the male thread.

Note: Keep the screw nut at a well-protected place. They may come in handy when the auger needs to be detached and the valves need to be sealed again.
- (Optional) If the male port on your excavator is not M16 but M14, convert the port to an M16
- male port by replacing it with the provided M14×5 male to M16×1.5 male thread adapter.
- Repeat steps for the other side.
- Remove the two nuts sealing the hydraulic ports on the auger, again covering the exposed ports with plastic wrap.
Note:
- If the hoses come with plastic plugs sealing the male ends, remove the plastic plugs.
- If no plugs, check if the inside of the ports is clean. If not, clean with pressurized air.
- Cover all exposed ends with plastic wrap.

Contamination inside the port may damage your excavator’s main pump.
- Having removed the piece of plastic wrap on the ends of one provided hose, the UPPER port of the auger, and the male thread on the LEFT (from the driver’s view) valve, connect the male end of the hose to the UPPER port of the auger, and its female end to the LEFT (from the driver’s view) valve on the excavator.

- Having removed the piece of plastic wrap on the ends of the other provided hose, the LOWER port of the auger, and the male thread on the RIGHT (from the driver’s view) valve, connect the male end of the hose to the LOWER port of the auger, and its female end to the RIGHT (from the driver’s view) valve on the excavator.

- Turn the hydraulic valves counterclockwise 90° until their debossing is parallel to the arm.
- Test the excavator to make sure you have enough hose length to perform the full range of the excavator’s operating heights, but be careful not to over-extend the cylinders. Check hydraulic hoses and connections for leaks.
5. For Excavators Without Hydraulic Valves For Its Hoses As Below:
This applies to all of our machines, except for the AHM 13.5 HP B&S Engine Mini Excavator. For instance, it covers:
- AHM 13.8HP Kubota Mini Excavator
- AHM 23HP B&S Engine Mini Excavator
- AHM 13.5HP Mini Excavator with Enclosed Cab
- AHM 13.5HP Mini Excavator B&S Engine with 6 Attachments
- Park the excavator on level ground.
- Lower the boom to a height that is easily accessible for mounting, slant the boom upward so that no hydraulic oil is leaking, and shut the engine.
- Wait until the engine and hydraulic oil have cooled to ambient temperature.
- Remove the screw nut of the hose on the excavator to expose the male thread by holding M still. Cover the exposed thread with plastic wrap (not included).
Note: DO NOT remove the male thread.

If you accidentally only removed the shell of the screw nut, remove the inside of the screw nut too to expose the male thread.

Note: Keep the screw nut at a well-protected place. They may come in handy when the auger needs to be detached and the valves need to be sealed again.
- (Optional) If the male port on your excavator is not M16 but M14, convert the port to an M16 male port by replacing it with the provided M14×1.5 male to M16×1.5 male thread adapter.
- Repeat step 4 and 5 for the other side.
- Remove the two nuts sealing the hydraulic ports on the auger, again covering the exposed ports with plastic wrap.

Note:
- If the hoses come with plastic plugs sealing the male ends, remove the plastic plugs.
- If no plugs, check if the inside of the ports is clean. If not, clean with pressurized air.
- Cover all exposed ends with plastic wrap.
- Having removed the piece of plastic wrap on the ends of one provided hose, the UPPER port of the auger, and the male thread on the LEFT (from the driver’s view) valve, connect the male end of the hose to the UPPER port of the auger, and its female end to the LEFT (from the driver’s view) valve on the excavator.

- Having removed the piece of plastic wrap on the ends of the other provided hose, the LOWER port of the auger, and the male thread on the RIGHT (from the driver’s view) valve, connect the male end of the hose to the LOWER port of the auger, and its female end to the RIGHT (from the driver’s view) valve on the excavator.

- Test the excavator to make sure you have enough hose length to perform the full range of the excavator’s operating heights, but be careful not to over-extend the cylinders. Check hydraulic hoses and connections for leaks.
Conclusion
Installing a hydraulic auger on your mini excavator doesn’t have to be a complicated task. By following these steps, you can ensure that your auger is securely attached and ready to tackle any job, from drilling holes for fence posts to planting trees.
When it comes to choosing a small or micro excavator attachment, AHM offers affordable, high-quality options. Whether you have questions before your purchase or need technical support after, our dedicated team is here to help.


