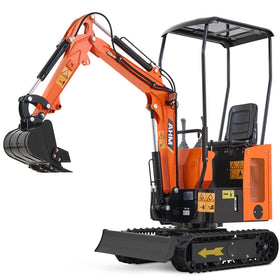
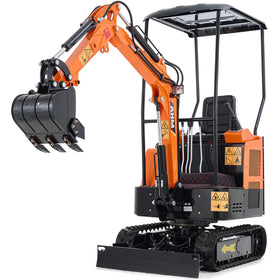
This guide breaks down the steps you need to follow, from starting the engine to handling basic excavation and bulldozing tasks. Whether you're new to construction or just brushing up on your skills, this guide will walk you through everything you need to know about how to operate a mini excavator, ensuring safe and efficient operation.
(Reading Time: 5-8 Minutes)
Preparing for Operation
Hey! Always remember, safety first! Before you even think about turning on the engine, it's crucial to inspect your compact excavator and communicate with your team. Circle the machine to check for any visible issues or anomalies.
Let your coworkers know that you're about to begin, and make sure your signalman or flagman is ready to assist.

Here’s how to operate a mini excavator using the AHM Kubota Engine Mini Excavator as an example.
Step 1: Entering the Cab and Starting the Engine
Once you've checked the small excavator and communicated with your team, it's time to get in the cab. Follow these steps:
1. Entering the Cab:

Sit down in the driver’s seat and ensure that there’s nothing blocking the dashboard or the joysticks. If you see any signs that the machine might be out of order, don’t hesitate—exit the cab immediately.
2. Fasten Your Seatbelt:

Safety first! Buckle up your seatbelt and ensure that all control rods or joysticks are in the neutral position. If they're not, reset them to neutral before moving on.
3. Starting the Engine:
Locate the red power switch on your left near the seat. Pull it in the direction indicated by the label.
Next, find the throttle lever. Hold the end of the lever, press the button on top, and push the lever away from you.

4. Ignition:
Insert the ignition key and turn it counterclockwise to preheat the engine glow plugs. Hold the key in place for 25 to 30 seconds if the temperature is below 35°F (2°C), or for 10 to 15 seconds if it's warmer. Finally, turn the key clockwise to start the engine.

If you are operating at a high altitude or the specific conditions make it hard for the engine to start, pull the engine choke knob a little bit to facilitate the ignition. Some models come with an engine choke, like AHM 23hp B&S Engine Mini Excavator.

Remember to replace it when the engine has started.

If you're using the hydraulics, some AHM excavator models have a hydraulic lock button. You’ll need to press the lock switch to unlock it.

Step 2: Using the Headlights and Excavation Timer
Once the engine is running, it’s important to check the headlights:
-
Headlights:
Find the headlights button and test it by turning it on and off. While the built-in headlights should be adequate for most tasks, remember that additional lighting might be necessary in certain conditions. Always turn off the lights when shutting down the engine.

-
Excavation Timer:
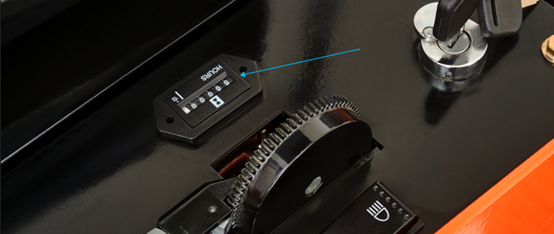
The excavation timer starts automatically when the power is on, recording the total working hours. It’s a handy feature for tracking machine usage, though keep in mind that it cannot be reset.
Step 3: Moving the Excavator
Now that the engine is running and the lights are working, you’re ready to move the micro excavator:
-
Forward and Backward Movement:
Make sure the engine has warmed up, as mentioned earlier.

- To move forward, push both of the two longer rods away from you.
- To move your excavator backward, pull them together towards you.
- To turn left while traveling, push the right travel rod while releasing the left one.
- To turn right while traveling, push the left travel rod while releasing the right one.
Be cautious—never push one rod while pulling the other, as this can cause the excavator to topple.
-
Speed Control:
Use the throttle lever to control your speed. Push it away from you to speed up and pull it towards you to slow down.
Step 4: Basic Excavation Techniques
Excavation is one of the primary tasks you’ll be performing with a small excavator. Here’s how to get started:
-
Positioning:
After starting the engine and warming up the compact excavator, steer it to the designated digging area. -
Using the Joysticks:
The left joystick controls the arm and swing functions, while the right one controls the boom and bucket. Push or pull the joysticks according to the direction you need to move each part of the machine.

The left joystick controls the arm and swing:
- To raise the arm (aka dipper, stick, or crowd), push it forward.
- To retract the arm, pull it toward you.
- To swing the cab left, push it to your left.
- To swing the cab right, push it to your right.
The right joystick controls the boom and bucket:
- To lower the boom, push it forward.
- To raise the boom, pull it toward you.
- To load the bucket, push it left.
- To unload the bucket, push it right.

Remember to be gentle with your movements to avoid unnecessary strain on the equipment.
Step 5: Bulldozing and Leveling
Apart from digging, your mini excavator can also handle bulldozing and leveling tasks:
-
Basic Bulldozing:
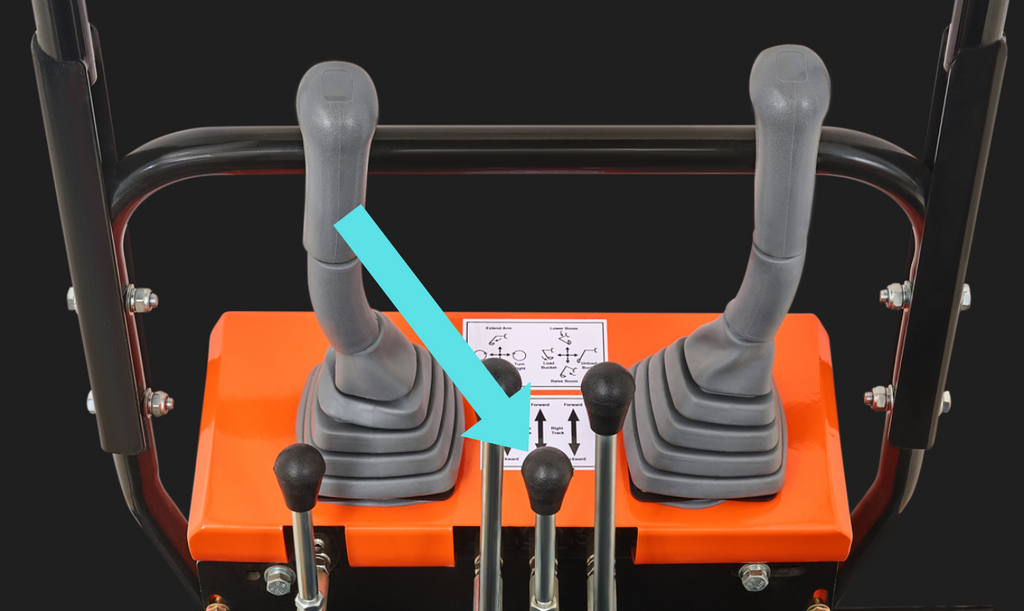
Make sure the control rods are in neutral before you start. Steer the machine to the area that needs bulldozing and use the shortest rod in the middle to raise or lower the dozer blade.
-
Leveling:
For leveling tasks, position the bucket near the ground and gradually push soil from the side of the mound. Adjust the bucket height as needed to avoid putting too much strain on the machine.

With practice, these steps will help you operate your small excavator smoothly and safely. Choose AHM for top-notch small excavators at unbeatable prices. Whether you need pre-sale information or post-sale technical support, our dedicated team is here to help. Contact us today!


