Installing underground power is like building a highway beneath your yard - it needs careful planning, the right tools, and proper technique to ensure it serves you safely for decades. As someone who's helped contractors install miles of direct burial wire, let me walk you through everything you need to know to do this job right.
1. What Type of Wire Do You Need for Direct Burial

Understanding the right wire choice is your first critical step. Direct burial wire requires special UF-rated (Underground Feeder) cables designed to withstand moisture and soil conditions.
These cables feature a thick, waterproof coating that protects the internal conductors from ground moisture and chemical exposure.
That’s why standard indoor electrical wire won't suffice, and using the wrong type risks system failure and creates serious safety hazards.
2. How Deep Does Direct Burial Wire Need to Be
The National Electrical Code (NEC) provides clear guidelines for direct burial wire depth, though local requirements may vary.
For residential power lines, your direct burial wire typically needs at least 24 inches of earth cover. However, this depth can change based on:
- Voltage requirements
- Local building codes
- Soil composition
- Intended wire use (main power vs. landscape lighting)
3. How Does a Mini Excavator Improve Direct Burial Wire Installation?

Precision matters when installing underground wiring, and this is where a mini excavator truly shines.
A mini excavator lets you create a trench for direct burial wire that's about 4-6 inches wider than your wire bundle. This extra space serves two crucial purposes:
First, it gives you room to lay a proper sand bedding underneath your wire - something that's nearly impossible with narrow trencher cuts.
Second, it allows for natural soil settlement without putting pressure on your buried wire.
Mini excavator’s compact design allows for exact depth control, ensuring your direct burial wire meets all safety requirements.
Unlike manual digging which can lead to uneven trenches, a mini excavator creates consistent channels that protect your wiring from future complications.

Choosing the Right Mini Excavator for Direct Burial Wire Projects
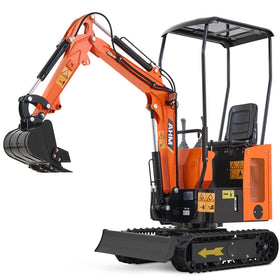
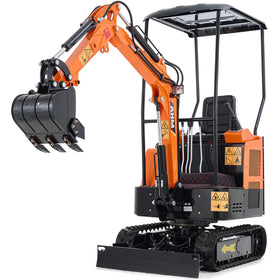
Looking for the perfect mini excavator for your direct burial wire installation? Here's why the AHM AX-16C stands out:
- Perfect Size: At just 3'33" wide, it fits through standard gates while maintaining stability
- Ideal Depth Control: 71-inch digging depth matches common direct burial requirements
- Precise Control: Hydraulic pilot system ensures exact trench depth and width
- Versatile Performance: 114-inch digging radius with swing boom for working along walls
- Power When Needed: 23 HP engine handles tough soil conditions
- Safe Operation: Built-in work lights and non-slip surfaces for secure installation
4. What Installation Steps Should You Follow for Direct Burial Wire?
Successful direct burial wire installation requires careful planning and execution.
Start by marking your planned route with marking paint, ensuring it avoids existing utilities and follows local regulations.
Using a mini excavator makes the digging process efficient, but remember to maintain consistent depth throughout.
Lay the wire with enough slack to prevent tension from ground settling, and always keep splices above ground in approved junction boxes.
5. The Hidden Challenges of Direct Burial Wire Installation
Let me share something I learned the hard way: the toughest part of installation isn't the digging - it's dealing with the unexpected.
Maybe you hit a patch of rocky soil, or discover an unmarked sprinkler line. This is where having a mini excavator really pays off. Its precise control lets you adapt quickly without compromising your installation quality.
Or maybe you have tried to run an extension cord through your garden and it got pinched under a rock. Now imagine that happening six feet underground. That's why proper installation matters so much.
6. How to Properly Backfill Your Direct Burial Wire Trench?
Backfilling isn't just about pushing dirt back into the trench. The soil directly surrounding your direct burial wire needs special attention.
Start with a layer of sand or fine soil to protect the wire's coating.
Your mini excavator can help precisely layer the backfill material, but avoid using the bucket to compact directly over the wire. Add warning tape about 12 inches above the wire to alert future diggers of its presence.
7. What Common Mistakes Should You Avoid?
Even experienced installers can make crucial errors when working with direct burial wire. Watch out for these common pitfalls:
- Skipping the utility locating service before digging
- Using incorrect wire types or splicing methods
- Forgetting to document wire locations for future reference
- Improper backfilling that could lead to wire damage
8. Conclusion

Whether you're powering a workshop, lighting up your landscape, or energizing outdoor equipment, the right tools and techniques make all the difference.
Remember that time we talked about treating your trench like a protective tunnel? That's where a quality mini excavator like the AHM AX-16C becomes your most valuable partner. Its precise control and swing boom capability turn what could be a weekend-long ordeal into a smooth, professional installation.
The path to successful underground wiring isn't always straight - just like those trenches we dig. But with proper planning, the right equipment, and attention to detail, you're setting yourself up for an installation that will stand the test of time. After all, the best direct burial wire installation is the one you never have to think about again.


