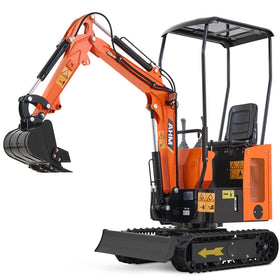
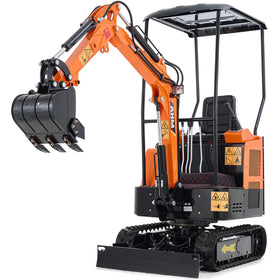
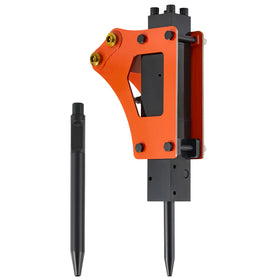
A mini excavator is already one of the most versatile tools on many job sites—but adding a grapple takes that versatility to an entirely different level. A grapple attachment allows you to grab, lift, and move logs, rocks, brush, and other large materials that would not be efficient or practical to move with a standard bucket. If you are clearing property, sorting debris, or handling landscaping materials, a grapple attachment for mini excavators provides superior control and efficiency. In this guide, we’ll walk you through everything you need to know to install a grapple on your mini excavator safely and effectively.

Know Your Grapple and Excavator Compatibility
Before you start installing a grapple on your mini excavator, it’s vital to verify that your grapple is compatible with your mini excavator. This step helps prevent damage and ensures safe operation. Here's what to check:
- Mounting System or Coupler Type: Confirm whether your excavator uses a quick coupler or pin-on system, and make sure your grapple matches. This is often the easiest way to identify compatibility.
- Pin Size and Spacing: Your grapple pins must also match the size and spacing on the excavator. Using the wrong pin could mean an insecure attachment or potential damage to the excavator.
- Hydraulic Flow and Pressure: Verify that your excavator's auxiliary hydraulics can supply the flow rate and pressure that your grapple requires. If the hydraulic system for the grapple is incompatible it can result in decreased performance, damage to the equipment or safety issues.
- Weight Capacity: Verify that the combined weight of the grapple and the loads deployed does not exceed the maximum lift capacity of your excavator. Overloading can be dangerous and cause equipment failure.
It is always good practice to review both your excavator and your grapple’s operation and maintenance manual.
How to Install a Grapple on a Mini Excavator:A Step-by-Step Guide
In this guide, we’ll use the AHM mini excavator grapple as an example for the installation process. If you are using a mini excavator or grapple from a different manufacturer, please refer to the specific instruction manual for your equipment.
The installation will generally be completed in two components: removing the current attachment and attaching the grapple. If you follow along with the instructions and recommended best practices, you will ensure a safe and efficient installation.
Part 1: Removing the Current Attachment
Note: This only provides general guidance on the excavator’s current attachment removal. For more specific information, refer to your excavator’s manual or your attachment’s manual.
STEP 1: Start the engine of the excavator following the normal protocols.
STEP 2: Park the excavator on level ground as shown, with the boom horizontal, the arm vertical, and lowering the attachment to the ground.

STEP 3: Shut off the engine.
STEP 4: Wait until the engine and hydraulic oil have cooled to ambient temperature.
STEP 5: Remove the bolts from the two pins connecting the attachment.

STEP 6: Tap out the pins with a hammer, keeping them clean.
STEP 7: Start the engine, raise the boom, and remove the current attachment.
Part 2: Attaching the Mini Excavator Grapple

STEP 1: Remove the upper hinge pin with its nut and the lower hinge pin with its bolt and nut on the grapple.
STEP 2: Use 2 or more people or a hoist to stand the grapple up on a level surface.
STEP 3: Start the engine of the excavator following the normal protocols.
STEP 4: Drive the excavator to the rear of the grapple.
STEP 5: Align the upper hinge pin holes with the eye of the excavator's arm cylinder, and align the lower hinge pin holes with the hole on the bottom of the excavator's arm by moving the boom and arm.
STEP 6: Shut off the engine.
STEP 7: Insert the removed upper hinge pin through the link holes, upper hinge pin holes, and the eye of the arm cylinder, and secure the pin with its removed nut.
STEP 8: Insert the removed lower hinge pin through the lower hinge pin holes and the hole on the bottom of the arm, and secure the pin with its removed bolt and nut.
STEP 9: Restart the engine and test the grapple by opening and closing its jaws.
Safety Checks and Maintenance Tips
Once you have securely connected your grapple to the mini excavator, it is important to conduct some preliminary safety inspection on the grapple before working. Doing so will help ensure that you are safe, and your equipment will operate well:
- Tighten all connections: Verify that all pins, bolts, and couplers are tight and locked. Loose parts can cause accidents or damage during use.
- Inspect hydraulic hoses: Carefully inspect all hydraulic hoses for any leaks, cracks, or indications of wear. Failure due to damaged hoses can lead to a hydraulic failure, so replace any questionable hoses before operating.
- Test movement carefully: Gently operate the grapple controls to open, close, and, if your grapple rotates, rotate it slowly. This helps you confirm everything moves smoothly without unusual noises or resistance.
- Grease moving parts: Regularly lubricate the pivot points and any other moving parts as recommended by the manufacturer’s maintenance guide. Proper greasing reduces wear and keeps the grapple working well.

Ready to Handle Your Job
With your new grapple attachment installed, your mini excavator is ready to handle tougher, more difficult jobs, from clearing fallen trees to sorting scrap or lifting awkward materials. This single upgrade can help you substantially improve efficiency while minimizing manual labor on your job site. Make sure to follow the manufacturer's safety and maintenance recommendations, and your grapple will last for years.
If still searching for a dependable mini excavator, or grapple attachment, check AHM website at ahmcorp.com. Their mini excavators and attachments are a smart choice for anyone who wants to work effectively and efficiently.


