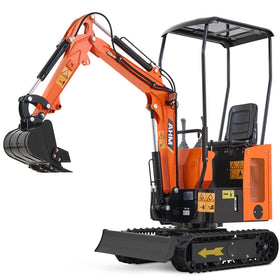
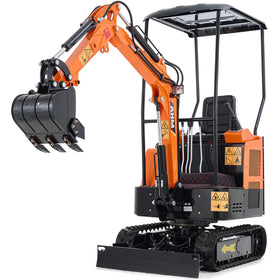
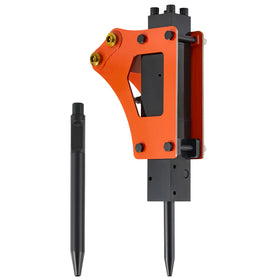
Learn how to effortlessly attach a hydraulic breaker to your mini excavator. This guide aids users by detailing parts included in the package and provides step-by-step installation instructions complemented with visuals.
(Reading Time: 3-5 Minutes)
1. What is a hydraulic breaker?
A hydraulic breaker, commonly known as a hydraulic hammer, is a powerful attachment used in construction and demolition projects to break through hard materials such as concrete, rock, and pavement.
AHM hydraulic rock breakers, specifically designed for versatility and efficiency, are ideal for 1-ton mini excavators, enhancing their capabilities for various tasks requiring precision and force.
Learn more: What is Hydraulic Breaker?
Package List
Once you've received the parts package for your AHM hydraulic breaker, you can begin preparing for the installation process. Prior to commencing installation, ensure thorough inspection of all components and familiarize yourself with the tools required for installation.
Below is the product list you'll receive upon purchasing our AHM hydraulic breaker.

|
No. |
Item |
Qty. |
|
A |
Spare Chisel |
1 |
|
B |
Hammer Assembly |
1 |
|
C |
Hose |
1 |
|
D |
Hose |
1 |
|
E |
Toolkit Box |
1 |
|
F |
24×27mm Wrench |
1 |
|
G |
27×30mm Wrench |
1 |
|
H |
Hex Wrench |
1 |
|
I |
Retaining Pin Plug Driver |
1 |
|
J |
Pressure Gauge |
1 |
|
K |
Nitrogen Charge Hose |
1 |
| L |
Nitrogen Canister |
1 |
Throughout the installation process, it's imperative to follow each step in the correct sequence and ensure the proper execution of each step. Below, we'll detail the installation steps for the AHM hydraulic hammer, accompanied by relevant images for enhanced understanding and guidance.
2. Installation
Mounting the Hammer
During installation, please be mindful of the following points:
- ONLY mount the hammer assembly with the help of more than 2 persons or with the assistance of a working, easily controllable, and reliable hoist. Doing it alone risks serious personal injuries.
- If the mini excavator has been active before the mounting, wait till the hydraulic oil has dropped to room temperature.
- Attach the arm pin first, then the attachment bracket pin, and finally the hydraulic hoses. Doing it alternatively could cause serious personal injuries or machinery damage.
- Keep your fingers clear of possible pinching points while mounting the hammer.
Caution
- Cover the hammer and excavator hydraulic ports once their plugs are removed, preventing foreign matter from entering the hydraulic system.
- Position the hammer on the wood blocks so that the chisel is at a lower level than the nitrogen
- This prevents foreign matter such as moisture or fine debris from entering the hammer.
- ALWAYS wait till the hydraulic oil has cooled to ambient temperature.
- ALWAYS follow the protocols for using a hoist.
Tools required: flathead screwdriver, work gloves, goggles, wood blocks, hoist, or an extra couple of hands
 |
1. Park the excavator on level ground, lower the dipper(arm) to a height that is easily accessible for mounting, and shut the engine. 2. When the engine and hydraulic oil have cooled to ambient temperature, remove the bolts and pins fastening the attachment to the dipper and attachment plate. |
 |
a. Check the hose end attached to the boom or the dipper. If it is as shown right, go to step b. Otherwise, skip step b and go right ahead to step c. b. Go start the engine, and raise the boom so that it’s slanted upward but still within reach. c. Shut the engine and wait till it and the hydraulic system have cooled to ambient temperature.
|
d. Remove the nut fastening the arm pin and do the same for the nut securing the attachment bracket pin. Keep the nuts and bolts nearby.

e. With the help of a hoist, lift the hammer to where its pin holes can align with the arm pin hole at the end of the dipper and with the attachment pin hole.

f. Insert one pin flange into each arm pin hole from the inside, being sure each is fully inserted.

g. Aligning the arm pin hole with that on the excavator dipper(arm), feed the removed arm pin sequentially through
• the housing of the hammer
• the pin flange
• the dipper
• the other flange and
• the other side of the housing.
h. Lock the pin with the removed pin nut and secure the other side of the pin with a set of removed bolt and nut.
i. Repeat steps f–g for the attachment pin.
Connecting the Hydraulic Hoses
• Cover the exposed hydraulic ports and hose ends
• Position the hammer on the wood blocks so that the chisel is at a lower level than the nitrogen chamber. This prevents foreign matter such as moisture or fine debris from entering the hammer.
• ALWAYS wait till the hydraulic oil has cooled to ambient temperature.
• ALWAYS follow the protocols for using a hoist.
Hydraulic Hoses without Valves
Check the hose ends attached to the boom or the dipper. If they are as shown right,

2. Extend the hammer a bit so the hydraulic ports on the hammer become easily accessible.

3.Shut the engine and wait till it and the hydraulic system have cooled to ambient temperature.
4.Remove the caps on the hydraulic ports with an adjustable wrench (not included). Cover the exposed ports with plastic wrap (not included) or similar thin but strong film.

5. Having removed the plastic wrap around the LEFT hydraulic port on the hammer, remove the port cap on the G½″ end of either hose.
7. Repeat for the other G½″ hose port and hammer port.

8. While holding the hose male port still, remove the hose cap and cover the male port with plastic wrap.


11. Remove the cap sealing of either M14×1.5 female port by turning the cap and holding the female port still.
12. Peeling of the wraps, instantly connect the exposed female port of the hose to the male hose on the small excavator.
13.Repeat for the other male port on the excavator.

Hydraulic Hoses with Valves
If the hydraulic hoses attached to the dipper have valves, as shown right,
1. Shut the engine if it has been running and wait till it and the hydraulic oil has cooled to ambient temperature.

2. Close the valve by turning it clockwise by 90° if the debossing is parallel to the hose.
3. Do the same for the other valve.

4.Remove the caps on the hydraulic ports with an adjustable wrench (not included). Cover the exposed ports with plastic wrap (not included) or similar thin but strong film.

5.Having removed the plastic wrap around the LEFT hydraulic port on the hammer, remove the port cap on the G½″ end of either hose.
Note: The hoses are interchangeable, but DO connect the left hydraulic port on the hammer to the left hydraulic hose on the excavator (from the driver’s perspective).

6. Connect the exposed G½″ female port to the exposed male port on the hammer.
7. Repeat for the other G½″ hose port and hammer port.
8. While holding the hose male port still, remove the hose cap and cover the exposed male port with plastic wrap.

|
9. Repeat for the other excavator hose male port.
|
 |
13. Open the valve by turning it counterclockwise by 90° if the debossing is perpendicular to the hose.


