
The key to successfully digging footings with a mini excavator is to focus on three things: precision, planning, and consistency.
There are three major sections when digging footings with a mini excavator: preparation, digging, and inspection. Each stage builds on the previous one, so the order is important. Also, the mini excavator plays a slightly different role in each of these sections.
- In the preparatory stage, you mark out the footing layout, check for utilities and assess soil conditions, and set up your mini excavator and attachments.
- The digging stage begins with a shallow initial pass, followed by inspecting the footing, leveling the base, and clearing out loose soil.
- The final stage focuses on inspection, compacting the base, and preparing the area for reinforcement.
The advantage of using a mini excavator is that it gives you control and efficiency, but your success depends on whether you are able to approach the job with a clear plan and proper technique.
 How to Dig Footings with a Mini Excavator: Step-by-Step
Stage 1: Prepare the Site
1. Mark the Footing Layout
Use stakes, string lines, or marking paint to outline the footing. This is an important first step because it gives you a visual guide to follow, preventing you from drifting or digging uneven lines. Without this layout, even an experienced operator can go off-track.
2. Check Utilities and Soil Conditions
Hitting underground utilities is dangerous and costly, and would definitely delay your project. You want to get that out of the way first.
Also, knowing the type of soil you are working with is important because it determines how deep and stable your footing needs to be.
Generally, the minimum depth for a footing is 12 inches below finished grade, but:
- Stable and dense soil, like gravel and sand, can often support shallow footings
- Loose and compressible soil, like soft clay and silt, requires deeper excavation because you need to dig until you reach firmer soil
- Expansive clay also requires deeper foundations to avoid active soil layers.
Checking the soil conditions helps you determine how deep you have to dig, which in turn tells you how much time you might have to speed on project, and how best to allocate your time and resources.
3. Set Up the Mini Excavator Properly
Position the machine on stable, level ground. With a mini excavator, how accurately you are able to dig is determined by how stable your base is. If the machine is tilted, your footing depth will be inconsistent. Also, you want to be sure that you will be working in good lighting conditions: You need clear vision to dig accurately.
4. Choose the Right Bucket
Select a bucket width that matches your footing requirements. Using the correct bucket reduces the need for rework and keeps edges clean and precise.
- A 12-inch narrow bucket, or a 24-inch wide trenching or digging bucket equipped with teeth, is usually the best choice for digging footings on large projects. It is more likely to match the required footing width while maintaining soil penetration.
- For a standard residential footing, a 16-inch or 18-inch bucket is often ideal: you get an accurate width, and there is little risk of over-excavating.
 Stage 2: Dig the Footing
1. Start with a Shallow Pass
Begin by removing the top layer of soil across the entire footing area. The purpose of this step is to create a consistent baseline and prevent uneven depth later. As you dig, always remember to watch your swing radius for layout lines.
2. Dig Gradually to Full Depth
When digging footings, do not dig straight to full depth. Instead, lower the bucket in controlled increments. When the digging is gradual, it is easier for you to maintain control and prevent over-excavation.
A very important tip here is to slow down near the final depth: this is where precision matters most
3. Keep the Bottom Flat
Use the bucket to level and smooth the base as you go. A flat bottom ensures even load distribution. Uneven surfaces can cause structural issues.
4. Maintain Straight Edges
Keep the bucket aligned with your layout lines. Clean edges reduce the need for manual correction and ensure the footing meets specifications.
5. Check Depth Frequently
Use a measuring stick or laser level to check the depth frequently, even as you dig. Catching mistakes early saves time and prevents rework. Avoid over-digging: fixing it takes more time than doing it right.
Stage 3: After Digging Is Complete
1. Inspect the Footing
To inspect a footing means to check its depth, width, and alignment. Inspecting the footing allows you to confirm whether it is ready for the next phase (like pouring concrete).
2. Compact the Base (If Required)
If the soil is too loose, use a compactor to compact the base. Compaction increases stability and prevents settling.
3. Clean Out Loose Soil
Remove debris and loose material from the bottom. Loose soil has to go because it weakens the foundation and reduces load-bearing capacity.
4. Prepare for Reinforcement or Concrete
Ensure the trench is ready for forms or rebar. A clean, properly shaped footing allows for a smooth transition to the next construction step.
Important Tips for Digging Footings With a Mini Excavator
1. Footings Are About Load Distribution
The entire purpose of a footing is to spread the weight of a structure evenly into the ground. That means the depth must be consistent, the width must meet specifications, and the soil must be stable and undisturbed
If you dig unevenly or disturb the soil too much, you weaken that load-bearing capacity.
2. Accuracy Always Beats Speed
A common mistake is rushing the digging process. With footings, over-digging creates extra work (you’ll need to backfill and compact), and under-digging leads to failed inspections or weak foundations. The strategy is simple: dig once, dig right.
3. Work With the Machine, Not Against It
Mini excavators are designed for controlled, precise digging, not aggressive trenching like larger machines. Use smooth, deliberate movements, and let the bucket do the cutting. Also, avoid jerky motions that disturb the surrounding soil, and keep your bucket teeth sharp. Sharp bucket teeth improve cutting efficiency
4. Approach the Project in Sections
Instead of digging the entire footing at once, break the area into manageable sections and complete each section to spec before moving on. This keeps your depth and width consistent across the entire project.
 How to Choose a Mini Excavator for Footings
Not all mini excavators perform the same when it comes to precision work like footings. If you are renting or buying a mini excavator for digging footings, you want a machine that is the right size/weight, is compatible with the right bucket options, has good hydraulics, and can dig properly.
1. It Must be the Right Size and Weight
Look for a machine that fits your project scale. It should be compact enough for tight spaces, but heavy enough for stability. Generally, 3-6 ton mini excavators are best for footings, but for a small residential project, you can go for a 1.5-2 ton mini excavator.
2. Compatible With Wide and Narrow Bucket Options
A machine with multiple bucket sizes is ideal for digging footings. It should be compatible with both narrow buckets (for trenches) and wider buckets (for larger footings).
3. Impressive Hydraulic Control Precision
Smooth controls are essential when digging footings. You want a mini excavator with familiar and responsive joysticks and as little lag in movement as possible.
4. Digging Depth Capability
Make sure the excavator can reach your required depth. Check the specs of the machine for the maximum digging depth and the reach/flexibility of the boom and arm.
5. It Must Have All the Required Stability Features
Stability improves accuracy. Go for a mini excavator with a wide track base and a dozer blade for transport.
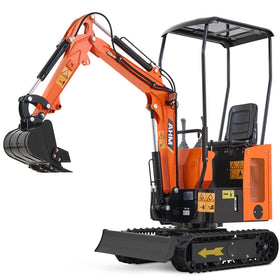
AHM AX-12B 13.5 HP B&S Engine Mini Excavator: Best for Digging Residential Footings
The AHM AX-12B 13.5HP is the ultimate value mini excavator on the market. With a 69 in. digging depth and 10-foot reach, it's perfect for foundation work, utility lines, and more. At just 3'1" wide, it squeezes into tight spaces with ease.
This budget-friendly powerhouse is ideal for DIYers and small contractors looking to maximize their dollar. It's the most affordable option in the lineup, making it the go-to choice for anyone stepping into the mini excavator world.
Final Thoughts on Digging Footings with a Mini Excavator
Digging footings with a mini excavator is less about brute force and more about control, planning, and precision. Once you understand the strategy and follow a structured process, the machine becomes an extension of your skill, not just a tool.
If you approach each job with the right mindset and method, you’ll consistently produce clean, accurate footings that set the stage for everything built on top of them.
Also, knowing how to dig footings with your mini excavator is an essential skill that always pays off. It saves time and money, improves the quality of your project, and greatly expands the range of jobs you can take on.
You may also be interested in how much to charge for mini excavator work, and how to determine prices for a footing project.


