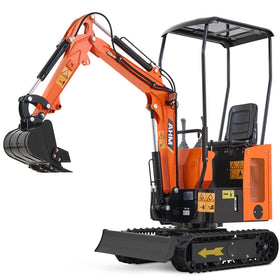
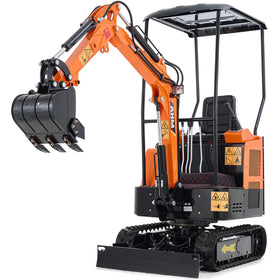
A mini excavator is one of the most versatile tools you can have for landscaping, construction, or property maintenance—but adding the right attachment can make it more powerful. One of the most practical attachments for cleanup and grading jobs is a ripper attachment. Whether you’re tackling compacted soil, removing roots, or preparing rocky terrain, a mini excavator ripper gives you the strength and precision you need. Installing the ripper correctly is key to getting the best performance and keeping your equipment safe. In this guide, we’ll walk you through the basic installation process and show you how to make the most of your new mini excavator ripper.

How to Install the Ripper Attachment on Your Mini Excavator
In this guide, we’ll use the AHM Ripper Attachment as an example to illustrate the general installation process.
1. Remove the preinstalled hinge pins and their nuts on the ripper.
2. Use 2 or more people or a hoist to stand the ripper up on a level surface.
3. Start the engine of the excavator following the normal protocols.
4. Drive the excavator to the rear of the ripper.
5. Align the hinge pin holes on the ripper with the ones on the bottom of the excavator arm by moving the boom and arm.
6. Shut off the engine.
7. Insert the removed hinge pins through the holes and secure the pins with their removed nuts.

8. Restart the engine and test the ripper by performing light operations to confirm its stability.
How to Use Your Mini Excavator Ripper
Once your ripper is securely attached, it’s time to put it to work. Mini excavator rippers are built for demanding ground conditions and can handle a wide range of tasks. Here’s how to use it safely:

1. Start the engine.
2. Lower the ripper into the ground and apply gradual pressure to penetrate the surface.
3. Once the ripper is in the ground, move the excavator forward or backward to create the
desired ripping effect. Adjust the angle and depth of the ripper as needed.
The work area must be kept clean so that you can see where to set the ripper. Therefore it
is advisable to haul away the demolition material constantly.
4. When the ripping is finished, raise the ripper off the ground.
5. Shut off the engine and clean the ripper.
Some Uswful Operation Safety Notes for You:
• NEVER use the ripper in areas where there is a risk of explosion.
• NEVER stand under the ripper.
• Use special caution to prevent tilting during transport when the ripper is disconnected from the machine. Always set the ripper on a firm, even, horizontal surface that can bear the weight of the support points.
• Maintain an appropriate safety distance to avoid the crushing hazard when handling,
transporting, installing, and removing the ripper.
• Beware of hot surfaces. Some of the ripper’s components get quite hot during operation,
especially the tooth and the fixing pin. This increases the risk of burns.
• ALWAYS remain focused on the task at hand. Operating heavy equipment requires your full attention.
• Use two or more persons to attach the ripper to the excavator’s arm.
• ONLY operate the ripper from the excavator’s cabin.
• NEVER lift heavy objects above the excavator’s cabin.
• NEVER operate the excavator in an area with people present. You should maintain at least 100 yards of distance between the ripper and people, animals, or property.
• Be extremely careful when working on inclines or near loose fill, rocks, and holes as they
can cause tipping or upsetting which may result in serious injury or death.
• Be certain to avoid overhead electrical wires when operating the excavator. Contact with
power lines may cause serious injury or death.
• DO NOT drive up to anyone or an animal in front of a fixed object such as a wall or bench. Never assume that the machine will stop in time.
Recommended: AHM Mini Excavator Ripper Attachment
If you’re looking for a powerful and easy-to-install attachment, the AHM Mini Excavator Ripper Attachment is a reliable choice. Built for demanding ground conditions, it combines strength, precision, and efficiency. Here are its features:
- Mini Excavator Scarifier: Excels at crushing and splitting hard soil, cutting through roots and small stumps, and even tearing out old barbed wire.
- Ideal Fit: Designed for AHM mini excavators and others up to 2 tons, with a 3.66 in. span, 0.98 in. arm pin housing distance, and 3.3 in. center wheelbase.
- Effortless Installation: Includes two hinge pins and two hydraulic hoses for quick setup and minimal downtime.
- Built for Tough Jobs: Crafted from high-hardness manganese steel for outstanding durability and wear resistance.

With its rugged construction and user-friendly design, this attachment makes upgrading your mini excavator both simple and worthwhile.
Conclusion
Installing a ripper on your mini excavator opens up new possibilities for handling demanding outdoor projects. With the right setup and technique, you’ll cut through compacted soil, roots, and rock with ease—saving time and extending the life of your machine. Take the time to follow your equipment manual, test the ripper carefully, and practice efficient operation. Soon, you’ll be tackling the tough jobs with confidence.


