
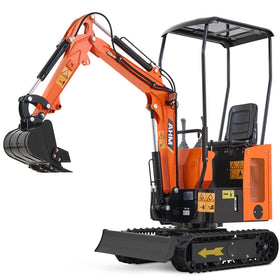
Operating a mini excavator means moving heavy loads with very small hand movements. So, if you are a first-time operator, taking the time to understand mini excavator pilot controls is one of the most important steps before turning the key.
As small as most models are, a mini excavator can be powerful and highly responsive. If you do not understand what each control does, you will very likely get confused at some point, move the wrong component, or operate inefficiently, all of which can be costly mistakes.
Simply put, learning how the controls work beforehand makes the operation smoother, safer, and much less stressful.
 Understanding Mini Excavator Pilot Controls
A lot of people focus on control patterns and operating techniques, but it always helps to understand what exactly pilot controls actually are and why modern excavators rely on them.
What Exactly Are Pilot Controls?
The pilot controls are hydraulic-assisted control systems that are used to operate excavator functions through joysticks and pedals. They use low-pressure hydraulic fluid to operate the main valves, which produces incredibly smooth and responsive movements, especially when you are operating a mini excavator in tight spaces.
So, instead of you, as the operator, having to physically move heavy hydraulic valves directly, the joystick sends a pilot signal that tells the hydraulic system what movement to perform.
You can think of this as simply giving instructions rather than manually forcing the machine to move. That is why excavator joysticks often feel smooth and light despite controlling thousands of pounds of moving machinery.
How Pilot Controls Work
Here’s what happens when you pull a joystick:
- Your movement activates a pilot valve, and the hydraulic pilot pressure changes
- Main hydraulic valves receive instructions, and hydraulic oil flows toward cylinders or motors
- The corresponding excavator component moves (according to the pattern of the joystick)
This setup allows small hand movements to create large machine movements. Unlike mechanical linkage, pilot controls offer effortless, "finger-tip" precision.
The process happens almost instantly, which gives excavators their responsiveness. The joysticks allow you to multitask smoothly, controlling the boom, stick, bucket, and swing simultaneously.
Understanding Mini Excavator Joystick Patterns
One of the biggest surprises for first-time operators is discovering that not every excavator uses the same joystick arrangement. Mini excavators generally feature one of two standard control patterns, which can often be switched via a lever in the cab:
- The SAE pattern
- The ISO pattern
Switching between them without realizing it can create immediate confusion.
What Are SAE Controls?
SAE stands for the “Society of Automotive Engineers pattern”, and it is the most common pattern that operators in North America learn. It is also called “CAT controls”, “backhoe controls”, or the North American pattern, and it determines which direction the arm, cab, boom, and bucket move depending on which joystick (left/right) is moved.
- Left Joystick: Controls the boom swing (left/right) and the main boom (forward/backward).
- Right Joystick: Controls the dipper stick (forward/backward) and the bucket (left/right)
How SAE Controls Work On A Mini Excavator

| Control | Direction | Function |
| Left Joystick | Forward | Boom lowers |
| Left Joystick | Back | Boom raises |
| Left Joystick | Left | Cab swings left |
| Left Joystick | Right | Cab swings right |
| Right Joystick | Forward | Arm extends |
| Right Joystick | Back | Arm retracts |
| Right Joystick | Left | Bucket curls open |
| Right Joystick | Right | Bucket curls inward |
What Are ISO Controls?
ISO stands for International Organization for Standardization, and it is the pattern most operators outside of North America learn using. It is also called excavator controls, or the John Deere pattern.
- The left joystick controls the boom swing (left/right) and the dipper stick (forward/backward).
- The right joystick controls the main boom (forward/backward to lower/raise) and the bucket (left/right to dump/curl).
How ISO Controls Work on a Mini Excavator

| Joystick | Movement Direction | Machine Function |
| Left Joystick | Forward | Boom lowers |
| Left Joystick | Back | Boom raises |
| Left Joystick | Left | Cab swings left |
| Left Joystick | Right | Cab swings right |
| Right Joystick | Forward | Arm extends |
| Right Joystick | Back | Arm retracts |
| Right Joystick | Left | Bucket curls open |
| Right Joystick | Right | Bucket curls inward |
Numerous newer excavators allow switching between these patterns, usually with the help of a lever in the cab.
SAE vs ISO: What Is the Difference?

The biggest difference between SAE and ISO joystick patterns on a mini excavator is where the boom and arm functions are assigned.
| SAE Pattern | ISO Pattern |
| The right hand controls the boom |
The left hand controls the boom |
| The left hand controls the arm | The right hand controls the arm |
This sounds minor until you actually sit in the seat. Muscle memory develops quickly in excavator operation, and an experienced operator who has used SAE for years and suddenly climbs into an ISO machine will instinctively move the wrong joystick. This can create awkward moments or potentially dangerous ones. The important thing is knowing which pattern your machine uses before operating.
 Other Mini Excavator Travel and Auxiliary Controls You Need to Know
1. The Travel Pedals
The tracks of a mini excavator are usually operated by two floor pedals or levers (one for each track). These floor pedals control forward movement, reverse movement, turning, and pivoting.
- Push both forward, and the mini excavator travels straight.
- Push one farther than the other, and the machine gradually turns.
- Push one forward and one backward, and the machine pivots.
Many beginners initially struggle because the travel direction can seem reversed after rotating the cab. For example, if the cab rotates 180 degrees, pushing forward may feel backward relative to your viewpoint. This is completely normal and takes practice.
2. The Blade Controls
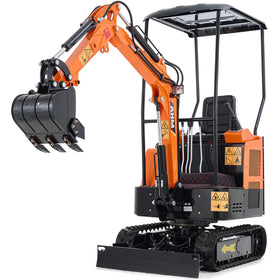
The dozer blade is controlled by a separate lever (usually on the right side), allowing you to raise/lower the front blade.
Most mini excavators include a front dozer blade that helps stabilize the machine, backfill trenches, improve grading, and increase digging stability. The blade lever raises or lowers the blade hydraulically. Keeping the blade positioned correctly improves safety and digging efficiency.
3. Auxiliary Hydraulic Controls
Many mini excavators operate attachments like hydraulic breakers, augers, grapples, compactors, and thumb attachments through auxiliary hydraulics. Auxiliary hydraulic controls are used to control these attachments. Auxiliary functions usually include:
- Thumb switches
- Buttons on joysticks
- Foot pedals
- Additional levers
Before using attachments, understand exactly which controls activate them.
Step-by-Step: Using Mini Excavator Pilot Controls for the First Time
Step 1: Sit and Identify Every Control
Before starting the engine, locate both joysticks, find the travel controls, and identify the blade controls. Then, locate auxiliary controls and check control pattern labels. Do not begin by guessing.
Step 2: Confirm the Control Pattern
Determine whether the machine uses SAE or ISO. Many mistakes happen because operators assume instead of checking.
Step 3: Start with Idle Speed
- Run the machine at lower throttle settings.
- Reduced hydraulic speed gives beginners more reaction time.
- Fast hydraulics can feel overwhelming initially.
Step 4: Practice One Function at a Time
Move only one joystick direction.
- Raise the boom. Stop.
- Lower the boom. Stop.
- Extend the arm. Stop.
- Curl the bucket. Stop.
Allow your brain to connect movement with joystick inputs.
Step 5: Combine Movements Slowly
Once you are comfortable, try doing multiple movements at once.
Try raising the boom while extending the arm.
Then practice swinging and digging simultaneously.
Smooth coordination develops over time.
Step 6: Practice Travel Last
Travel often confuses beginners because machine orientation changes constantly. Spend time driving slowly in open space.
 Useful Mini Excavator Pilot Control Tips
1. Dealing with Jerky Movements
Operators frequently note that budget or older pilot control valves tend to have a "deadzone" before the fluid pressure bites. To smooth out jerky movements, some users swap to lighter pilot springs or install 3/8-inch fuel line sleeves over the valves for better tactile resistance.
2. Dealing With Pattern Changes
Modern machines usually have an easy ISO/SAE pattern changer, but if you have an older machine, you may need to swap hydraulic pilot hoses.
3. Keep Your Movements Small
Large joystick movements usually create jerky operation. Experienced operators often make surprisingly small inputs. Tiny movements produce smoother control.
4. Learn the Machine at Low Speed
Speed can come later. Smooth operation matters more than fast operation.
Many experienced operators say, "Slow becomes smooth, and smooth becomes fast."
Final Thoughts on Mini Excavator Pilot Controls
For beginners, learning joystick patterns, understanding travel controls, and practicing one movement at a time can dramatically shorten the learning curve. The goal is not speed on day one; it is confidence, control, and consistency.
Spend time learning the controls before digging your first trench, and the machine will quickly begin feeling less like a confusing collection of levers and more like an extension of your own hands. You may be interested in the technicalities of operating a mini excavator in different ground conditions.


