
Do you know that using mini excavators typically reduces pool demolition time by 30% and significantly minimizes damage to surrounding landscaping.
Nearly 40% of pool demolition projects face costly complications due to equipment access issues. Mini excavators solve this common challenge, fitting through standard 36-inch gates while still delivering the power needed to break through reinforced concrete pool walls. Let's explore how to tackle your pool demolition project efficiently and safely.
How Much Does Pool Demolition Cost With a Mini Excavator
Before breaking ground, you need to secure proper permits and understand the full scope of costs. Most municipalities require:
- Demolition permit ($500-1,500)
- Utility disconnection verification
- Site inspection before and after backfilling
- Professional engineering reports, especially for pools near structures
Start by visiting your city or county's building department website. Most municipalities now offer online permit portals where you can find specific requirements for pool removal projects. For example, if you're in Los Angeles, visit the Department of Building and Safety for detailed guidance.
Traditional pool demolition with full-size equipment typically costs 40-50% more due to additional site preparation and landscape restoration needs. In contrast, mini excavator pool demolition offers significant savings:
Complete pool removal typically costs between $9,000 and $15,000 with a mini excavator, including:
- Equipment rental: $200-400 per day
- Labor (2-3 person crew): $2,000-3,500
- Disposal fees: $1,000-2,000
- Backfill material: $800-1,500
Partial removal reduces these costs by 40-50% but may affect future property use options.
Can You Use a Mini Excavator for Pool Demolition
Modern mini excavators in the 1-2 ton range offer ideal capabilities for residential pool demolition projects. Their compact size combined with powerful hydraulic systems provides several key advantages:
Reduced Access Preparation:
Unlike full-size excavators that might require fence removal, mini excavators navigate through existing yard spaces, saving $1,000-2,000 in site preparation costs.
Precision Control: Equipped with hydraulic breaker attachments, these machines allow operators to precisely control demolition, reducing the risk of damage to nearby structures or utilities.
Required Mini Excavator Attachments:
- Hydraulic breaker (2,000-3,000 ft-lbs impact force)
- Mini excavator bucket for material removal
- Thumb attachment for handling larger concrete pieces
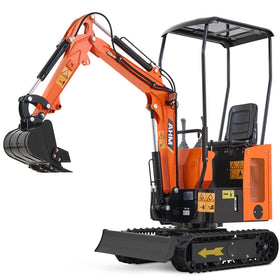
Today's mini excavators are perfect for taking out residential pools. Take AHM AX-16C for example. It's got some serious features that make pool demolition easier and faster.
The star of the show is its swing boom system. This clever design lets you work from different angles without moving the whole machine. That's huge when you're breaking up pool walls in tight spaces.
Here's what makes it special:
- Digs down to 71 inches - perfect for most home pools
- Reaches out 114 inches across bigger pools
- Fits through a standard gate at just 3'3" wide
- Lifts 265 pounds of concrete chunks easily
- Won't bang into your house or fence thanks to reduced tail-swing

Step-by-Step Pool Demolition Process
Phase 1: Site Preparation and Safety Setup (1 Day)
The success of your pool demolition project begins with thorough site preparation. Professional contractors using mini excavators follow a systematic approach that prioritizes safety and efficiency.
Start with essential documentation and verification:
- Confirm active demolition permits
- Obtain utility locating service clearance
- Schedule required municipal inspections
- Complete environmental compliance checks
Establish a proper equipment staging area:
- Position your compact excavator on stable, level ground
- Create dedicated concrete staging zones
- Install safety barriers around the entire work zone
- Set up dewatering equipment if needed
Complete the pre-demolition checklist:
- Drain pool water and neutralize chemicals
- Remove all pool equipment including pumps and filters
- Document existing site conditions with detailed photos
- Verify mini excavator attachments are properly secured
Phase 2: Systematic Demolition Approach (1-2 Days)

Efficient inground pool removal requires proper mini excavator operation and technique. Professional operators follow these key steps:
Equipment Setup and Safety:
- Mount hydraulic breaker attachment securely
- Position mini excavator at the shallow end
- Maintain optimal 45-degree breaking angle
- Keep excavator tracks parallel to pool edge
Professional Breaking Sequence:
- Remove pool deck working from outside edges inward
- Break pool walls into manageable 2-3 foot sections
- Create stable access ramp for material removal
- Follow systematic breaking pattern for efficiency
Phase 3: Material Management and Drainage (1-2 Days)
Proper handling of demolished materials ensures efficient progress and environmental compliance:
Material Removal Process:
- Sort concrete and rebar separately for recycling
- Create drainage holes (12" diameter every 6 feet)
- Establish proper material staging areas
- Coordinate with approved disposal facilities
Environmental Considerations:
- Implement erosion control measures
- Monitor groundwater conditions
- Follow local recycling requirements
- Document proper material disposal
Phase 4: Professional Backfilling (1-2 Days)
Quality backfilling determines the future stability of your restored yard space:
Layer Specifications:
- Base: Clean crushed stone (4-6 inches)
- Main: Compactable soil in 8-inch lifts
- Surface: Premium topsoil (4-6 inches)
Compaction Requirements:
- Achieve minimum 90% compaction per lift
- Test compaction levels systematically
- Document compaction test results
- Adjust moisture content as needed
Managing Pool-Type Specific Challenges
Different pool types require specific mini excavator techniques:
Concrete Pool Demolition:
- Break 6-8 inch walls systematically
- Start at corners working inward
- Use proper hydraulic breaker force
- Separate rebar during demolition
Fiberglass Pool Removal:
- Remove supporting soil carefully
- Lift and separate sections intact
- Reduce project time by 30-40%
- Handle materials following regulations
Vinyl Liner Pool Demolition:
- Remove liner before excavation
- Demolish support structure systematically
- Handle materials appropriately
- Maintain proper breaking sequence
Final Site Restoration and Documentation
Ensure long-term satisfaction with proper completion:
Grading Requirements:
- Establish 1-2% slope away from structures
- Verify compaction meets local codes
- Prepare surface for new landscaping
- Install proper drainage systems
Documentation Needs:
- Photograph completed work
- Obtain final inspections
- Record compaction test results
- File completion documents
Your mini excavator's precision controls enable accurate final grading, preventing future drainage issues and ensuring a properly restored yard space that's ready for its next purpose.
Wrapping It Up
Mini excavators have made pool demolition a whole lot simpler. Modern features like swing booms and precise controls mean you can turn that old pool into usable space without destroying your yard.
Before you start, make sure to:
- Check your local rules
- Get your permits in order
- Plan your new yard layout
Pick the right mini excavator and follow these steps. You'll have that pool gone and your yard ready for something new in no time.


